Estimated reading time: 5 minutes
We have recently been tasked with fixing a problem with Configuration Manager 2012 SP1 and deploying a fat Windows XP wim image to a Dell Latitude E5510 with the newer generation of Intel processors, in this case the processor was an Intel i3 Processor.
The problem was this, the customer had a fat Windows XP wim image with everything loaded into it, including Office 2010 and a number of customer applications. The image file has been deployed to a whole range of older laptops including Dell D-Series and early release E-Series (like the E5500) and has always worked perfectly well. This has also included the older E5510 laptops with the earlier generations of Intel processors. However, now trying to load the same image on to a slightly newer E5510 with Intel i3 Processors, the image was not fully loading.
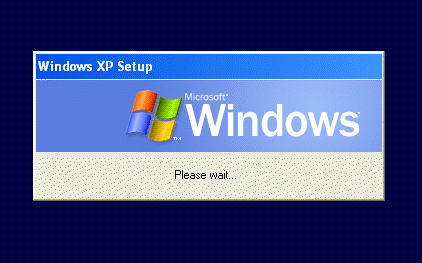
The Operating System Deployment (OSD) task sequence would go through the normal steps until after the machine had rebooted into the Windows setup part of the sequence. Then, it would get “stuck” at the Windows XP Setup – Please Wait… screen and it would never move from there.

So, what is the problem? There are a number of factors to take into consideration with slightly newer hardware and the deployment of Windows XP. Now, this is a bit of a disclaimer – the way that we have fixed this particular problem worked for this image, with this hardware, for this customer – it may not be the “best practice” way of doing things and it may not work for you, but it is something to consider and possibly try for yourselves if you are fully out of ideas! However this did work fully for us in this case…
First of all, we noticed that the E5510 had a BIOS version of A07 – having checked the Dell Support website we found that the E5510 models latest BIOS was A16. A lot of people and IT Departments under estimate the importance of keeping BIOS versions fully up to date – I would never try and diagnose a machine without ensuring that it was on the latest BIOS version first.
So, we had to upgrade the E5510 to the latest BIOS version – simple right? well no, you cannot just upgrade to A16 from anything less than A10 and you cannot upgrade to A10 from anything less than A09! But they would be easy to find surely? well no! The Dell Support website only seems to have A11 and onwards for the E5510. So we had to go searching for A09 and A10 whilst we downloaded the A16 latest BIOS from Dell.
Now, to help those looking for these files, we will post a direct link to these two elusive Dell BIOS updates below:
DELL LATITUDE E5510 BIOS UPDATES
Once you have loaded these two BIOS updates in sequence (A09 first then A10!) you can then download from the Dell Support website the A16 (this is the latest version at time of writing this post) and load this onto your E5510 laptop.
So great, we now have the latest version of the BIOS on the machine – but that still does not solve all our problems. Having then looked into the customers drivers setup, we found that the drivers they were using for the E5510 were around 18 months out of date – including the fact that they did not have the correct drivers for the SATA, AHCI or NIC. We needed to get all the latest drivers for the E5510, so we went back to the Dell Support website for the E5510 and downloaded every single latest version of the drivers for this device and loaded them into Configuration Manager and prepared them for use with the Windows XP task sequence deployment.
Having done all of this, we re-run the OSD TS on the E5510 with the Intel i3 Processor and it ran all the way through to the end and worked perfectly!
So, as an overview, if you are having problems like this, it is always worth checking the following:
- Is the BIOS fully up to date?
- Do I have the very latest manufacturer drivers in my Configuration Manager driver packages?
BUT WAIT! There is still one more thing that can cause you problems with a Windows XP deployment. Choosing SATA, RAID or AHCI. We have seen in the past machines having had Windows XP deployed to them constantly blue screening on boot up – this has been due to the BIOS having RAID or AHCI set – change it to S/ATA, reload the image and see what happens – it should work!
Comments
If you have any comments or further suggestions or just want to thank us! Please leave a comment below using our comments system.
Share this content:


