 By Andrew Armstrong
Part of our Active Directory and Group Policy guides: every related guide in one place.
Does your 1st line help desk get fed up of having to reset end users passwords “because they didn’t know their password was expiring?”
Well, let us show you a way that you can utilise System Center Orchestrator (SCORCH), PowerShell and Active Directory Web Services (ADWS) to email all end users a few days before their password is due to expire and also send them a daily email if they still do not change their password after the first notification.
The modern approach: PowerShell, Task Scheduler and Azure Automation
SCORCH itself is legacy at this point, and most environments have either retired it or never had it in the first place. The underlying need, warning users before their password expires, hasn’t gone away. If you’re setting this up today, you don’t need SCORCH or a runbook designer at all: a PowerShell script on a schedule does the same job with less overhead. The SCORCH walkthrough below is kept for anyone already using it, but for new setups, use the approach in this section instead.
The core check compares each user’s PasswordLastSet value against the domain’s max password age, then emails anyone inside the notice window using the Microsoft Graph PowerShell SDK (Send-MailMessage is deprecated, so don’t reach for that):
# Password expiry notification - modern PowerShell version
# Requires: ActiveDirectory module, Microsoft.Graph.Users.Actions module
# and an app registration with Mail.Send application permission

$daysNotice = 7
$tenantId = "your-tenant-id"
$clientId = "your-app-registration-client-id"
$certThumbprint = "your-cert-thumbprint"
$fromUserId = "helpdesk@yourdomain.com"

Import-Module ActiveDirectory
Connect-MgGraph -TenantId $tenantId -ClientId $clientId -CertificateThumbprint $certThumbprint -NoWelcome

$maxAge = (Get-ADDefaultDomainPasswordPolicy).MaxPasswordAge
$users = Get-ADUser -Filter {Enabled -eq $true -and PasswordNeverExpires -eq $false} -Properties PasswordLastSet, EmailAddress

foreach ($user in $users) {
    if (-not $user.PasswordLastSet -or -not $user.EmailAddress) { continue }
    $expiryDate = $user.PasswordLastSet + $maxAge
    $daysLeft = ($expiryDate - (Get-Date)).Days

    if ($daysLeft -ge 0 -and $daysLeft -le $daysNotice) {
        $params = @{
            Message = @{
                Subject = "Your password expires in $daysLeft day(s)"
                Body = @{
                    ContentType = "Text"
                    Content = "Hi $($user.GivenName), your Active Directory password expires on $($expiryDate.ToString('dd MMM yyyy')). Please change it before then to avoid being locked out."
                }
                ToRecipients = @(@{ EmailAddress = @{ Address = $user.EmailAddress } })
            }
        }
        Send-MgUserMail -UserId $fromUserId -BodyParameter $params
    }
}
Running it as a Scheduled Task
Save the script as Send-PasswordExpiryNotice.ps1 on a domain-joined server that has the ActiveDirectory module and network access to your tenant. Create a Task Scheduler task that runs daily, action powershell.exe -NoProfile -ExecutionPolicy Bypass -File "C:\Scripts\Send-PasswordExpiryNotice.ps1", running as a service account with read access to AD and permission to send mail via the app registration. No SCORCH, no runbook designer, no extra infrastructure.
Running it as an Azure Automation runbook
If you’d rather not rely on a single on-prem box staying online, publish the same script as a PowerShell runbook in an Azure Automation account and set a daily schedule against it. For an on-premises AD, you’ll need a Hybrid Runbook Worker on a domain-joined machine so the runbook can reach Active Directory, with the Graph mail send handled in the cloud as before. This gets you the scheduling and monitoring of Azure Automation without keeping a dedicated server around just for this one task.
Prerequisites
You will need to have SCORCH setup in your environment and also ADWS so that our PowerShell script can talk to your Active Directory to get the account information.
You will also need a good understanding of Active Directory, SCORCH Runbooks, PowerShell and Email. But we will try to make this as simple as possible.
Instructions
First of all, we need to load up SCORCH and create a new runbook. Give the runbook an appropriate name and then drag in a Monitor Date/Time activity from under the Scheduling branch:

Now, you have a choice to make on how often you want this runbook to run. For the purposes of this guide, we are going to run it every Monday at 8am. So, double click the Monitor Data/Time item and click the Details tab on the left and enter 08:00 under the Interval section:
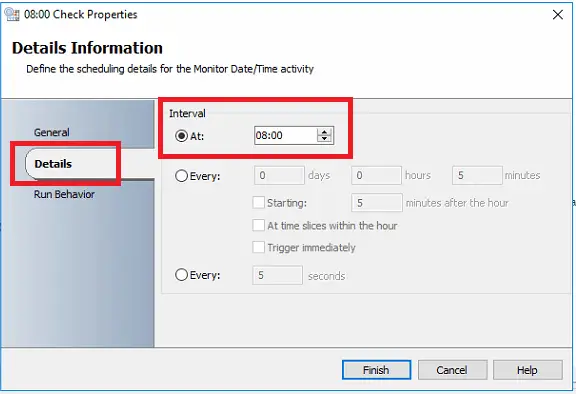
You can also go ahead and click the General tab and give the item a better name. For this guide, we have called it 08:00 Check.
So we now have our runbook setup to run at 08:00 everyday, but we only want it to run on a Monday. To do this, we need to create a schedule under Global Settings > Schedules:
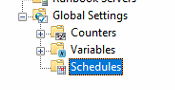
Right click the Schedule folder and click New > Schedule. This will bring up the New Schedule box, enter an appropriate name for the schedule and then click on the Details tab. This will now bring up the Days of week radio buttons. You should now make your selections and ensure that you tick all of the Occurrence tick boxes. So you should end up with something similar to this:
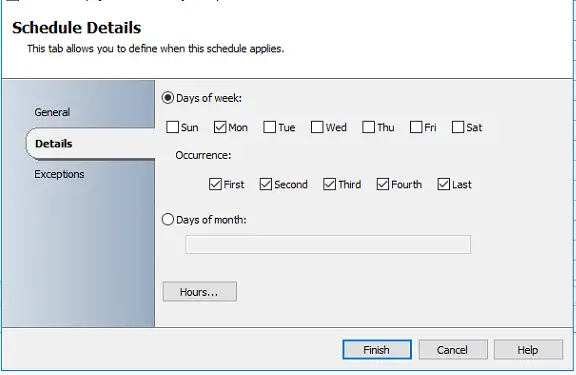
Now we go back into our runbook and add a Check Schedule activity from under the Scheduling section and join the two schedules together:
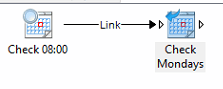
Then double click the Check Schedule item and give it an appropriate name (we have called our Check Mondays) and then click on the Details tab. From here, click the three dots in the box and browse to the schedule we just created:
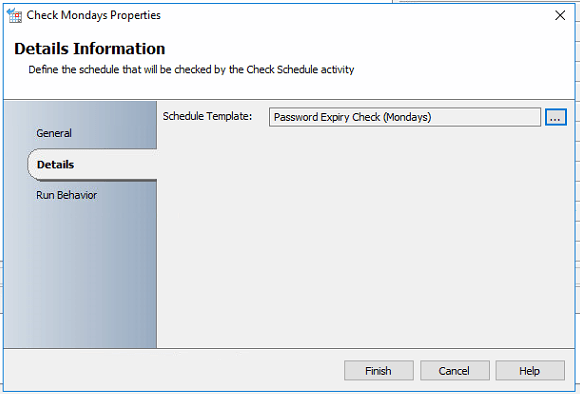
Then go ahead and click the Finish button.
Now we need to add our PowerShell script to the runbook so add a Run .Net Script item from under the System activity and then join the Check Mondays schedule item to the Run .Net Script:
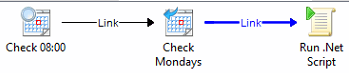
Now double left click the Link part you can see highlighted blue in the above image. This will bring up the Include Filters box:
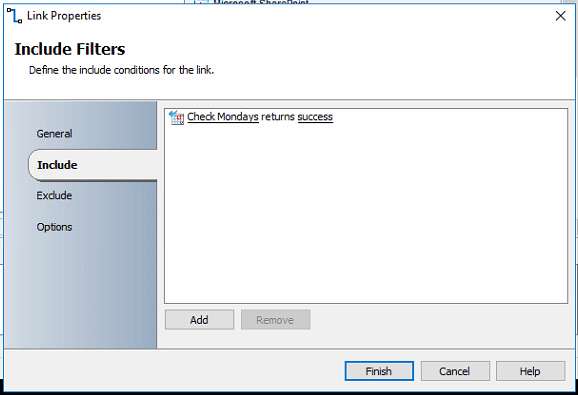
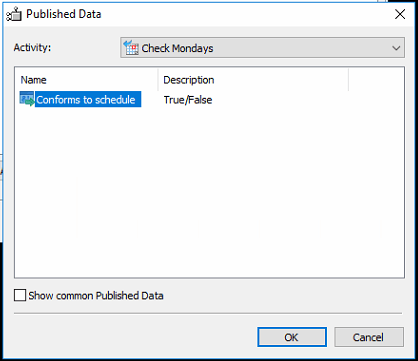
Click on the Check Mondays link within the Includes Filter tab. This will bring up a Published Data box where you should select Conforms to schedule option and click the OK button:
Then click on the Value option which will bring up a drop down, select the value to be True:
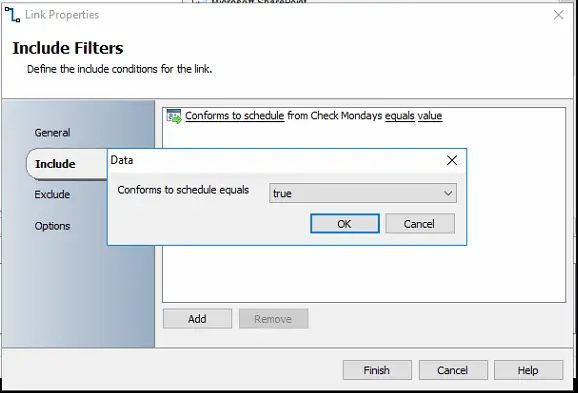
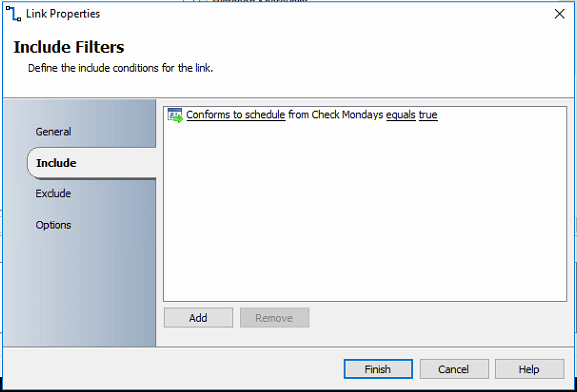
Click on the OK button and then you should have an Includes Filter that looks like this:
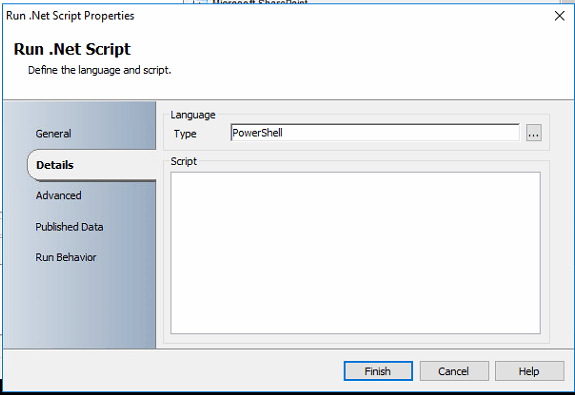
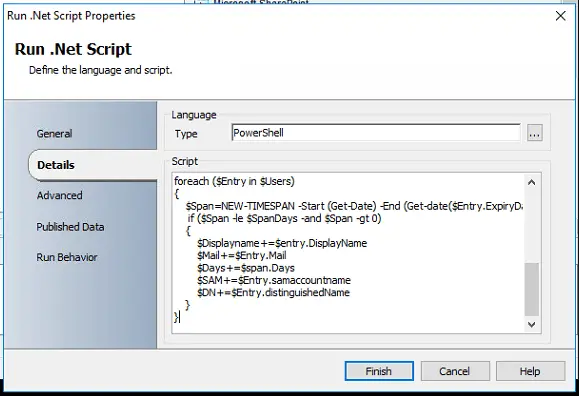
Now we move back to our Run .Net Script. Double click it and it will take you into the Language Type. Click the three dots button and select PowerShell:
Now we need to enter our PowerShell into the Script section. The PowerShell script we are going to use is below:
Import-Module ActiveDirectory
#Day of span to limit the Result
$SpanDays="5"
#Settings
$Displayname=@()
$Mail=@()
$Days=@()
$Sam=@()
$DN=@()
#Get all Users which are enabled and Password will expire
$Users=Get-ADUser -filter {(Enabled -eq $True) -and
(PasswordNeverExpires -eq $False)} -Properties DisplayName,
msDS-UserPasswordExpiryTimeComputed, Mail, samaccountname,
distinguishedName | Where-Object {$_.DisplayName -ne $null} |
Select Mail, samaccountname,distinguishedName,
DisplayName,@{Name="ExpiryDate";Expression=
{([datetime]::fromfiletime($_."msDS-UserPasswordExpiryTimeComputed")).DateTime}}
#Go through each User and check if password will expire in the next XX Days, see Span configuration
foreach ($Entry in $Users)
{
$Span=NEW-TIMESPAN -Start (Get-Date) -End (Get-date($Entry.ExpiryDate))
if ($Span -le $SpanDays -and $Span -gt 0)
{
$Displayname+=$entry.DisplayName
$Mail+=$Entry.Mail
$Days+=$span.Days
$SAM+=$Entry.samaccountname
$DN+=$Entry.distinguishedName
}
}
Once you have entered the script, click on the Published Data tab:
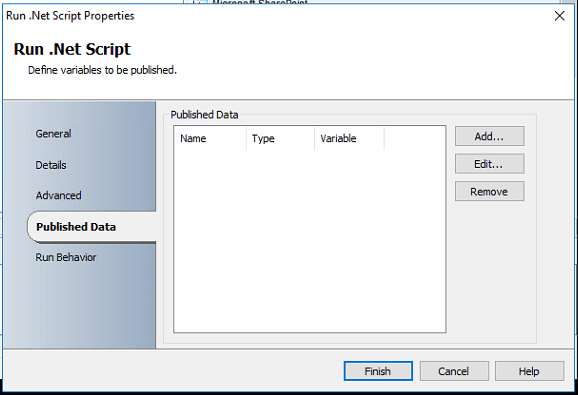
Click on the Add button to enter each published data you want to use. These are the values you should enter:
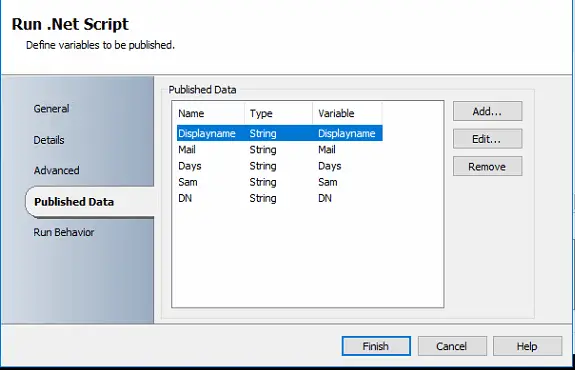
- Displayname
- Days
- Sam
- DN
All of these should be string types and the Variables should be the same as the name. So you should end up with something like this:
You can now go ahead and click on the Finish button.
We now need to add the final piece to the runbook – the email that will be sent to the end user. Under the Email activity, add a Send Email item to the end of the runbook and join the Run .Net Script to it:

Double click the Send Email item and you can now setup your email to be sent as usual (i.e. the Connect tab with the sender address and mail server) but you can now also use the Published Data to create your email body.
The only part that should not be customised to your needs is the recipients. This should have the Published Data of {Mail from “Run .Net Script”} as this is where the email will be sent to. You could always add your help desk into the CC or BCC if they want to know that an end user has been notified that their password is expiring.
Click Finish and Check In and Run your runbook. What should happen now is that every users’ password that is due to expire in the next 5 days will get an email as your specified.
You can change around all the options to get it to how you want it but this is a great process to have once completed and should save your help desk a lot of unnecessary work (even if it just means telling an end user that they must have ignored the alerts that their password was expiring!!).
Feedback
if you have any questions or feedback on this guide, please feel free to leave us a message below in our comments section and we will get back to you as soon as we can.
Gear We Recommend
Managing Windows environments day to day? Here are the admin tools and hardware we rely on.
Browse our Windows Admin Toolkit picks on AmazonAs an Amazon Associate, TechyGeeksHome earns from qualifying purchases.
Discover more from TechyGeeksHome
Subscribe to get the latest posts sent to your email.
