Estimated reading time: 9 minutes
We had been looking for a way of boosting our Jetpack subscribers as although we have over 4 million hits in total on our blog and over 5000 visitors a day, not many people actually sign up to follow our blog.
This is probably due to us providing technical guides and once someone has what they need, they move on and tend to not come back.
But we wanted to change that and get more people to return to us…
Newsletters
When you start to Google things like getting visitors to return to your site, you tend to get a lot of guides on newsletter pop-ups and sending MailChimp emails to your visitors.
We really did not like the sound of this for a few reasons:
- Newsletters are full of junk and can be very annoying to your visitors
- Services like MailChimp are not cheap
- It’s yet more work to create newsletters and send them out
- If you use a plugin that sends email via your host server, you can get banned for spamming
So we decided against going for a standard newsletter approach…
Jetpack Email Subscriptions
Like pretty much every WordPress blog on the planet, we use Jetpack plugin for the various services that it offers. One of those services is email subscription.
This service provides a solution to visitors that enter their email address into a simple shortcode form and sends them an email when you post new content to your blog.
The advantages of this service over any newsletter plugin are plenty:
- Jetpack automatically sends an email to all subscribers without any interaction on the blog writers part – just submit your article and it will take care of it
- The sign up form is very simple, just have your visitor enter an email address and click the Submit button
- It is NOT a newsletter – most visitors will be put off entering their email address into a newsletter form as they just automatically assume that they will then get spammed – a free subscription to only new content is a much more welcoming prospect
Where do you start?
Let’s assume that you have now decided that we are right and you want to use a Jetpack subscription service to get your visitors to sign up to your article updates. You will now need to install the Jetpack plugin if you haven’t already.
There are plenty of Jetpack plugin setup articles out there so we are not going to reinvent the wheel, so for the purposes of this guide, we will assume that you have Jetpack setup and working already.
Enable the Jetpack Subscription Module
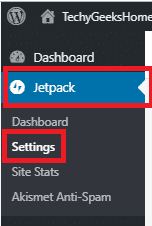
You will need to ensure that you have the Jetpack subscription module enabled. To do this, click into your Jetpack option on the left side menu and then click the Settings:
Then in the main pane, click on the Discussion tab at the top menu bar:
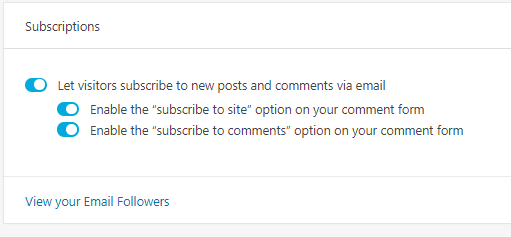
Then scroll down the page a little and using the slider, enable the Subscriptions module:
This will now have enabled the Subscription module on your blog. It also enables some new shortcodes for you to use which we will be taking advance of when creating a sign up form and also a pop-up form.
Creating a Signup Form
Now you have your Jetpack subscription service setup and ready to accept new signups, you need to provide a front end to your visitors to enable them to sign up.
There are a few different ways that you can do this, but we are going to show you how to create a basic page with a sign up form and then a pop-up sign up form which will appear when a visitor tries to leave your website.
Basic Signup Form
To create a very simple signup form you should go ahead and create a new page or post. Then within that page, enter the title you want and you can enter some text into the page explaining what this page is about and what they are signing up to.
As an example of this, we use the following text in our signup form:
Sign up to our free subscription service and receive an email whenever we post new articles. Just enter your email address below and click the Subscribe button.
Once you have your text in place, you will now use the new Jetpack shortcode available to you which will automatically ad a simple signup field and submission button:
jetpack_subscription_form show_only_email_and_button=”true” custom_background_button_color=”undefined” custom_text_button_color=”undefined” submit_button_text=”Subscribe” submit_button_classes=”undefined” show_subscribers_total=”true”
NOTE: Remember to add the starting [ bracket and then ending ] bracket around the above shortcode.
There are a few parameters in there, like show_subscribers_total=”true” that you can amend to suit your own requirements.
When you are happy with your page, go ahead and publish it and you should then see a nice simple signup form like ours below:

Now when visitors enter their own email address and click the Submit button, they will then receive an email whenever you publish new content on your website.
Pop-up on exit Signup Form
Moving onto a more interesting way of getting visitors to subscribe to your website, we will now look at how to create a pop-up when a visitor goes to leave your website. This will bounce out at them and offer a way of entering their email address to signup to your free subscription service.
Hustle
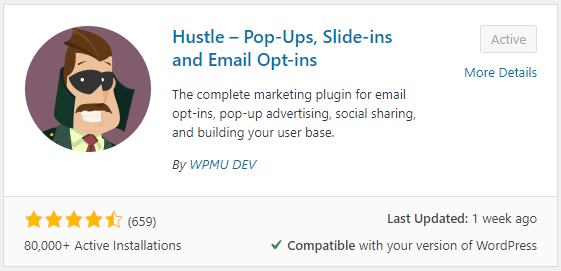
To do this, we are going to need to install the Hustle plugin. This is a free plugin and has all the services we need to be able to create our pop-up.
Just go into you plugins area in your WordPress administration portal and search for Hustle, then install and active the plugin:
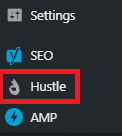
On your left hand WordPress menu, you should then see Hustle available to click:
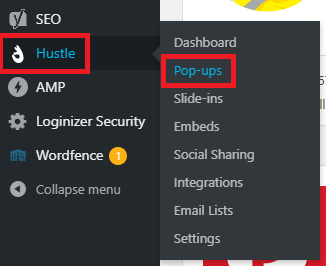
Then click on the Pop-Ups option menu:
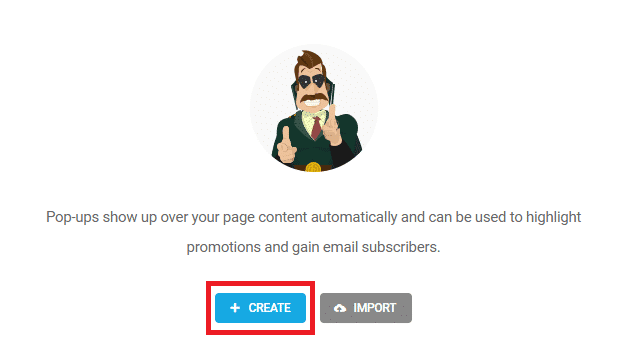
This will then take you to the Pop-Ups setup wizard and you should now click on the Create button:
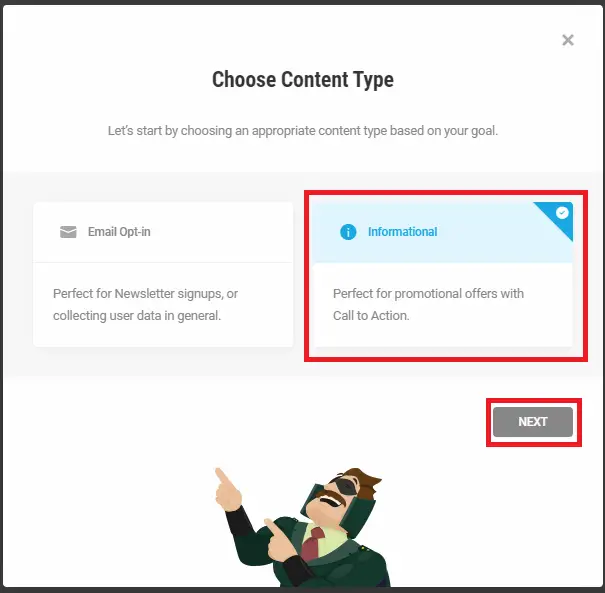
Then select the Informational content type and click the Next button:
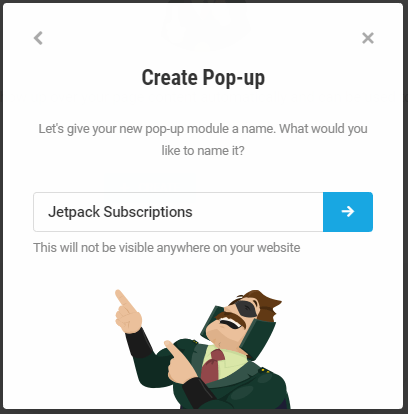
Then give your new pop-up a descriptive name and click the arrow button to continue:
This will now take you to the setup pages for the new pop-up. The first page is where you will enter all your title, subtitle and content text.
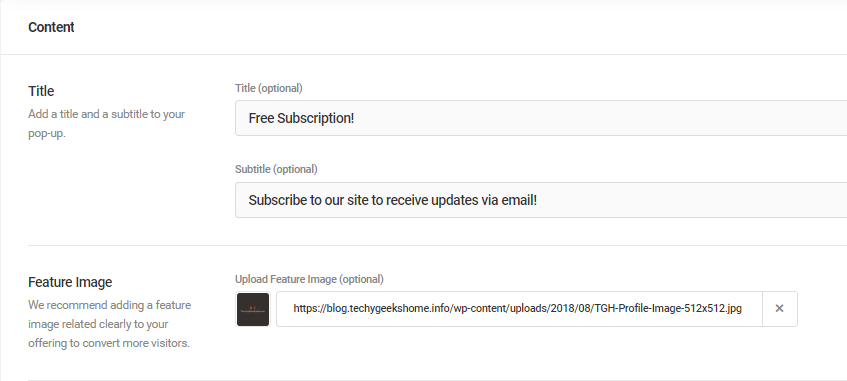
Enter what you want your title and subtitle to be and you should also add your site logo or any other image you want to use:
Then scroll down and enter the text that you want to display on your pop-up. This is also where you now need to enter your Jetpack shortcode. This will then display the Jetpack signup form within the pop-up:
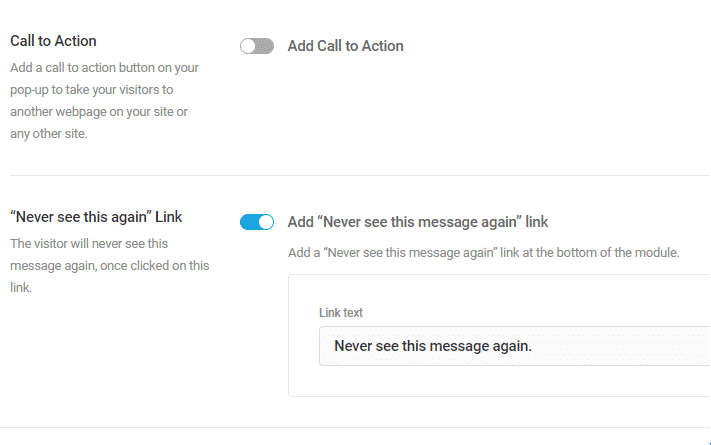
If you then scroll down a little further, you have the option to add a Call to Action button or a Never Seen This Message Again button. We enable this to allow our visitors to disable the pop-up if they so wish.
Once you have done this you can then carry on stepping through the wizard to make changes to the layout and design of your new pop-up. For the purposes of this guide, we are going to skip through the design options as they are pretty self-explanatory and customisable to how you want them.
Visibility
When you get to the Visibility page of the setup wizard, you can go through the various options that are available for it you only want the pop-up to show up on posts, pages or download pages. Again, this is completely customisable to your own website.
Behaviour
The behaviour tab is very important to get the new pop-up to act how you want it to act. The options that you have to setup here are:
- Time
- Scroll
- Click
- Exit Intent
- AdBlock
We want our pop-up to appear when a visitor is about to leave the site, this is to entice them into staying a little long (reducing bounce rate!) but mostly to get them to enter their email into our subscription service.
Like the other stages of this setup, all these options are completely customisable to your own website requirements.
So we have gone ahead and selected the Exit Intent option with only show once during session (as to not annoy visitors with it popping up all the time) and a bounce in animation to bring it that much more to the attention of the visitor:
Once you are happy with all your settings, you can go ahead and click on the Publish button to active the pop-up on your site!
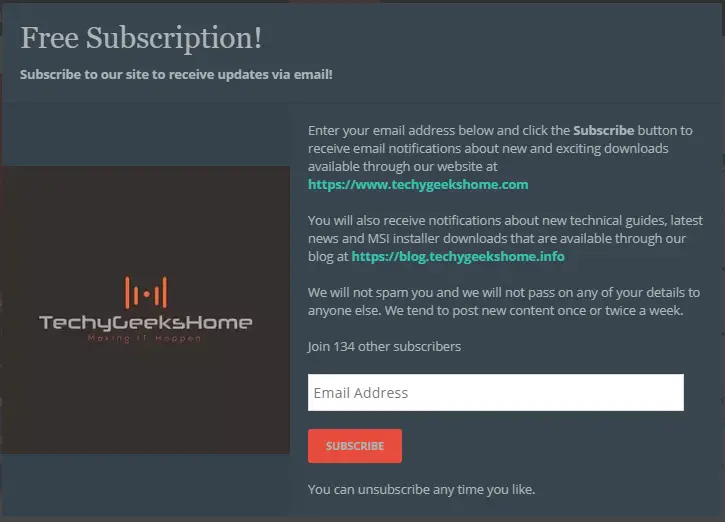
You should now go and test it out to make sure everything is how you want it. Trigger the pop-up in whichever method you set it up and it should pop-up like this:
Now when your visitors try to leave your site, they will get this pop-up bounce in on their page, they will probably choose to ignore it, but a few may now sign up to your email subscription service, potentially bringing my traffic back to your website.
Conclusion
It can become very expensive to start paying for newsletter plugins and services. By using our guide and the free Jetpack service, you can get yourself a nice way of updating your email subscribers without having to build a newsletter and also save yourself a ton of cash.
Please also be aware that we are in no way affiliated to Jetpack or Hustle in anyway, this is just our findings on how to do this for free.
Feedback
We really hope that you find this guide helpful and we would love to hear back from you and any success stories you may have in using this method of getting visitors back to your site.
Also, if you have any questions or problems in following our guide, please do not hesitate to leave us a message below in the comments area or you can get us on our various social media channels.
We put a lot of time and effort in to our guides so please leave us a message below so that we know it’s all worth the work!
Share this content:
