Estimated reading time: 4 minutes
A simple utility that aims to help you fix the connection problems when you want to use the legacy fat Cisco VPN client on newer versions of Windows.
By default, this legacy client is only compatible with Windows 7 and below – but our utility will allow it to run perfectly on newer operating systems.
Cisco AnyConnect VPN Client Fix is designed to bypass the connection failures while attempting to use the VPN client on your computer.
You may notice that when you try to connect to your VPN site using newer versions of Windows, that it will try and then just time out and you will be left with an error – our utility will resolve this problem for you.
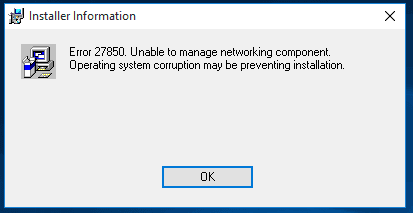
If you are trying to install Cisco VPN Client on a newer Windows machine, then you will probably get an error telling you that it is incompatible with the version of Windows you are using:

You just need to install our application and restart the computer in order to successfully connect.
Our latest release includes the fix as a MSI file which makes it easy for the network administrators to deploy it to multiple computers. The download package comes with the EXE installer file and a full set of instructions of how to use this fix are available here.
Download
Features
- MSI Deployment Installer
- No adverts
- No branding
- MSI and EXE installers for easy mass distribution
- Instant download availability
- x64 and x86 versions included in the package
- Windows 10 Compatibility
- Completely free
Instructions
You also need to ensure that you have the Cisco VPN Client installer.
Once you have these you should extract the VPN fix package which will give you the following utilities:
- WinFix.exe – Windows Fixup for DNE
- DNEUpdatex86.msi – DNE Updater for x86 Operating Systems (Provided by Citrix)
- DNEUpdatex64.msi – DNE Updater for x64 Operating Systems (Provided by Citrix)
- CiscoVPNClientFixx64.exe – Cisco VPN Client Fix for x64 Operating Systems (Provided by TechyGeeksHome)
- CiscoVPNClientFixx86.exe – Cisco VPN Client Fix for x86 Operating Systems (Provided by TechyGeeksHome)
You have to run these utilities in a particular order to enable this to work. So, identify the architecture of the operating system you are using, for this guide we will use x64.
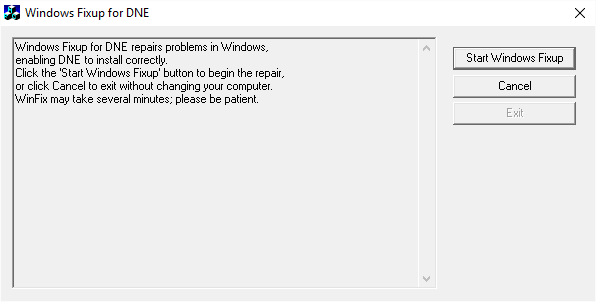
Run the WinFix.exe utility first and you will be presented with a box like this:

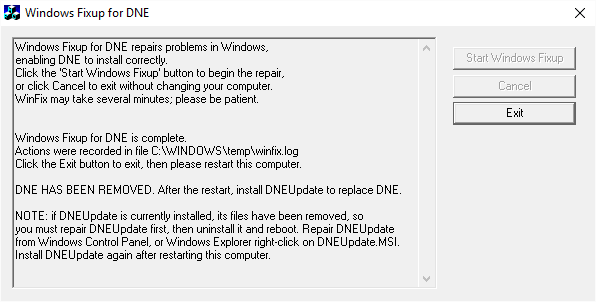
You should click on the Start Windows Fixup button to start the process, once completed you will get a message in the utility like this:

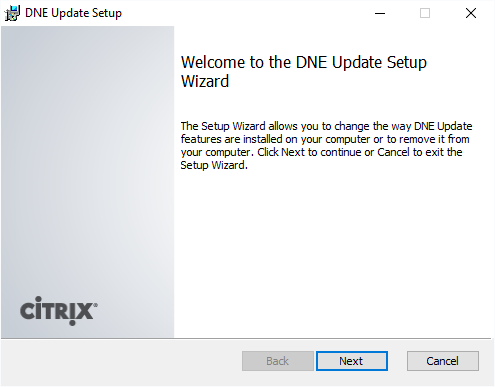
You can then move on to installing the DNE Update utility. So double click the DNEUpdatex64.msi and you will see a standard installation wizard like the one below:

You can then go ahead and install the Cisco VPN Client which should now install without any problems – but ensure that you use the MSI file to start the install process, NOT the EXE file.
However, this is not the end of the process as the VPN Client, although successfully installed, will not actually connect to your VPN profiles.
So, to fix this issue, you should now install the Cisco VPN Client Fix x64.msi (x64 operating system) or Cisco VPN Client Fix x86.msi (x86 operating system) again just running through all the wizard defaults.
Once this is complete, you should reboot your computer. Then you should be able to fire up your Cisco VPN Client and connect to your VPN profiles without any trouble!
Feedback
We would love to hear your feedback on this article so come and join us on Facebook or Twitter and let us know what you think!
Share this content:

