Estimated reading time: 3 minutes
If you are using a Shoretel telephony system then you probably are aware of the pain of getting voice recording prompts into the correct format for use with the system. You may also struggle with getting people to record the messages you require unless you go out to a professional recording service.
However, text to voice has come a long way and is pretty good now and you can use these services to create Shoretel voice recording prompts.
Below is a quick guide on how to get your text to speech recordings into the correct format for use with Shoretel.
Instructions
First of all, you should go to a text to speech service. One that we like as its quick and easy to use is “From Text to Speech” and this is what we will use for this guide.
So go to this website and type out the recorded message that you want to convert to speech:
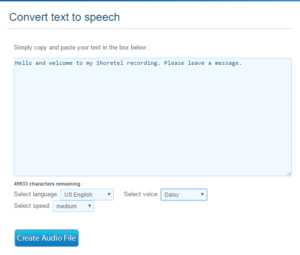
Select the language and voice you want and then click on the “Create Audio File” button. This will then create your speech file into an MP3 format:
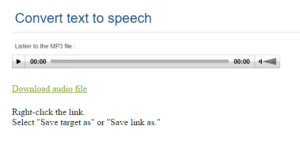
Right click on the “Download audio file” and save to your machine. You now have the MP3 audio file but you cannot use this in Shoretel as it is the incorrect format. So you should now install Audacity which is a free to use product.
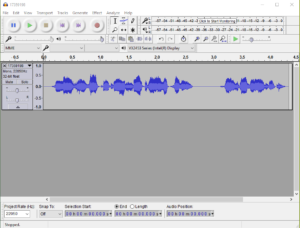
Once Audacity is installed, start up the program and then click “File” and “Open“. Then browse for your MP3 file and open it up in Audacity. You should now see something similar to this:
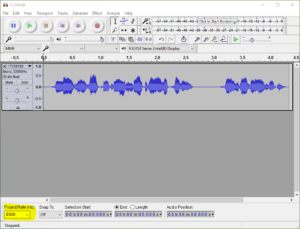
You then need to change the “Project Rate (Hz):” at the bottom left corner to 8000.
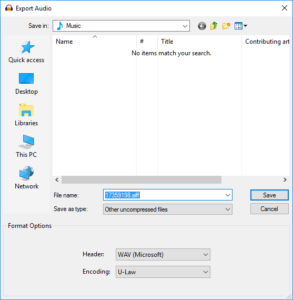
Then click “File” and select “Export Audio“. This will bring up the standard browse dialog box, here you can set the file name and location, but the important part is to change the “Save as type:” drop down to “Other uncompressed files“. Then for the “Header:” drop down select “WAV (Microsoft)” and for the “Encoding:” drop down select “U-Law“. So you should end up with something like this:
Another dialog box entitled “Edit Metadata” will appear, you can just go ahead and click the “OK” button that.
That will then complete the process and you will have a filename with an “aiff” file extension which you can now import directly into your Shoretel system!
Comments
If you have any comments or questions on this guide, please feel free to leave us a message below using our comments system.
Share this content:
