Estimated reading time: 2 minutes
On April 8th 2014, Microsoft ended all support for Windows XP. They then released a number of Windows Updates that displays annoying messages on your desktop telling you that your operating system is now at its end of life. This is the Windows message:
The second is the Microsoft Security Essentials one:
We have been asked a number of times about how to remove these and we have now created a new utility that will help you to do this.
DOWNLOAD
CONSIDERATIONS
There is one problem with removing the Microsoft Security Essentials end of life message. If you have already installed Version 4.5.216.0 then you cannot remove this message. Also, eventually, your system will update to this version so the best thing to do is to uninstall MSE and install another free anti-virus like Avast or Avira.
If you have not yet installed Version 4.5.216.0 then this utility will work for you for the MSE part. The Windows end of life message should be able to be removed without issue using this utility.
You must have Dot Net 2.0 installed for this to work.
INSTRUCTIONS
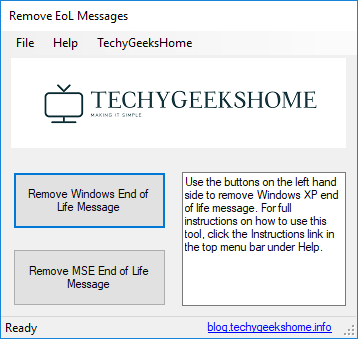
Once you have downloaded the file you should run the executable file to start the utility. You will then be presented with a utility that looks like this:
You should then click the buttons on the left hand side in relation to what you want to do. So, if you want to remove the Windows message, click the top button, if you want to remove the MSE message, click the bottom button.
Once you have done this, you should reboot your machine and you should now notice that the messages have not reappeared.
COMMENTS
If you have any questions or comments about this, please feel free to use our comments section below.
Share this content:
Discover more from TechyGeeksHome
Subscribe to get the latest posts sent to your email.


