Estimated reading time: 6 minutes
Security is a must these days and if you have spent as much time as I have on your blog, then you want to ensure that it is safe for your visitors to come to you and submit information, safe in the knowledge that it is protected and secure.
Also as a blogger, traffic is probably very important to you and where do most of everyone’s traffic come from? Google of course.
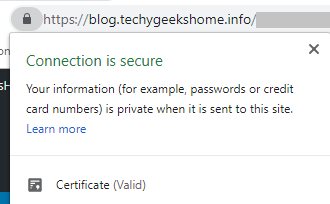
A third temptation to get you to move over to an encrypted site is the little green padlock in the address bar of your browser and a valid certificate, like our one (taken from Google Chrome browser):
So how can you take these two factors and satisfy them both with one simple fix? the answer is very simple, move away from your insecure HTTP setup to a secure HTTPS setup.
I have read many posts and comments on social media where “non-techy” people are scared stiff of making these changes in case it completely screws up their website that they have spent years working on. However, the process is super simple and you don’t need to be a geek or a techy to do it, nor do you need to spend any of that hard earned Google Adsense money.
What I am saying here is that you can set up your site with a secure HTTPS (SSL certificate) connection for completely free. No scams, no clickbait – just simple and free.
What options do you have?
Let’s Encrypt
I must stress here that there are a number of ways you can do this, there is a Let’s Encrypt option which again is free, by may be a bit more complicated. I’ve never used it so it’s not really fair for me to comment too much on it, but it is an option if you want to do some research into it.
Hosting Providers
You can of course log a support ticket with your own hosting provider and see what options that they may have available to you. If you are looking for a new hosting provider or your current provider cannot help, I would suggest that you take a look at the siteground hosting review page as this will give you honest opinions and reviews from real-world users which might tempt you to change your provider. While, on the other hand, if you’re interested to know what are some stable Siteground alternatives available, check out the referenced article on AlterWebHost.
But the way I am going to demonstrate is the way that I have setup all mine and my clients sites.
What Content Management System are you using?
The first thing you need to do is to identify what you are using as your content management system (CMS). For a large majority of blogs, WordPress has been the CMS platform of choice, it is also mine. This guide will walk through the steps needed to setup for a WordPress blog, however, if you are using another CMS platform and you are hosted on a Nginx or Apache server, then I would suggest you take a look at this guide from Kinsta that explains how to set that platforms up. It is more complicated though, so for this guide, I am going to go through the process using WordPress.
Cloudflare
NOTE: For Cloudflare to work, you have to redirect your nameservers to Cloudflare. This means if you want to make any DNS changes in the future, you do it in your Cloudflare portal, not through your hosting. If you are not happy with this, do not bother reading on!
The first thing you will need to carry out is to setup a free Cloudflare account. Cloudflare offer you a free service which includes free caching, free enhanced security again attacks on your site and what we are really here for, free SSL certificate for your site.
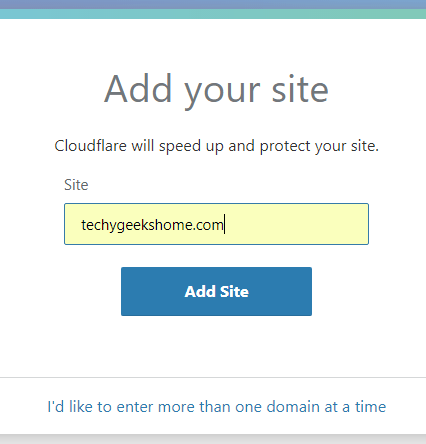
The sign up process is simple, just complete the registration form and you are in. Then you need to add your site to your Cloudflare account. To do this, at the top right of the screen you will see an Add site button:
Type in your domain name and then click on the Add Site button:
Then select the Free plan:
Cloudflare will then pull through all your DNS entries for you, you should not have to make any changes here unless you want to. You can go ahead and click the Continue button.
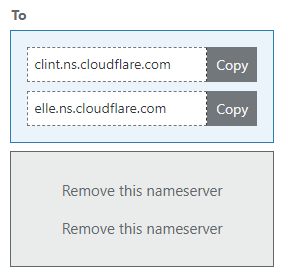
You will now get to the part where you will be given the information to change your nameservers. All you need to do is to take note of the Cloudflare nameservers that they want you to change to:
Then email your host and ask them to change your domain nameservers to those provided by Cloudflare. Once you have made this request and your host has made this change, wait up to 48 hours for the change to propagate and login to your Cloudflare account. You should now see that the status is now Active:
Applying the SSL Certificate (HTTP – HTTPS)
You can have a browse around the Cloudflare portal if you like and try out some new settings like Caching, Analytics and Apps, but for now, we are going to go into the Crypto section and change the SSL setting to Full:
Then on the same page, scroll down and change the following to be switched on:
- Always use HTTPS
- Automatic HTTPS Rewrites
You then have to wait for around 24 hours for a certificate to be produced and then automatically applied to your site.
After that time, go to your site and you should now see that you have HTTPS setup. You should also noticed that even if your visitors go to your site using HTTP, that it will automatically redirect them to your HTTPS site.
Sanity Checking
There are a few things you should check once you have carried this out:
- Are your images appearing correctly? – if not, install a WordPress plugin called Really Simple SSL and activate it – this should resolve any issues with hard links to your images or other little niggles you may have.
- Is HTTP redirecting to HTTPS? – if not, check your Cloudflare portal and make sure the two features above are switched on.
- Clear any caches that you may setup.
That is it, you should now have a fully functional site with HTTPS enabled. Google will love you and so will your visitors!
Feedback
If you have any questions or want to leave us some feedback on your experience, you can get us on our Social Media platforms or leave us a message below in the comments section.
Share this content:
Discover more from TechyGeeksHome
Subscribe to get the latest posts sent to your email.


