Estimated reading time: 2 minutes
If you are a regular user of Visual Studio and you also use the Visual Studio Installer to create EXE and MSI installers for your programs then you sometimes may need to copy files to the ProgramData hidden folder.
Within Visual Studio Installer this option is not easily available to you like the User’s Desktop is for example:
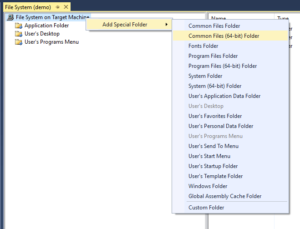
However, you can carry this out by using the Custom Folder special folder.
Instructions
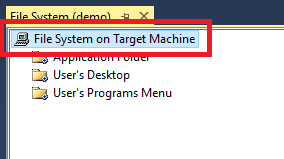
When you have opened your Visual Studio Installer project you should right click on the File System on Target Machine:
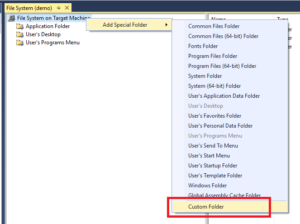
Then go ahead and click on the Custom Folder:
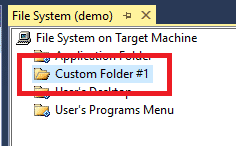
This will then create Custom Folder #1:
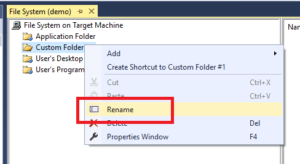
You should then go ahead and right click on the folder and click Rename:
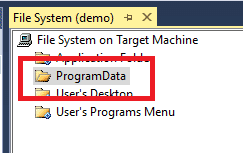
Then rename the folder to ProgramData:
That is the folder structure part complete but you now need to change the folder properties to ensure that the DefaultLocation points to the correct folder as by default it points to [TARGETDIR]:
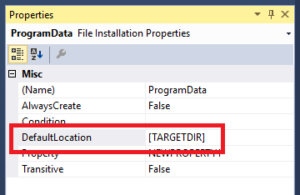
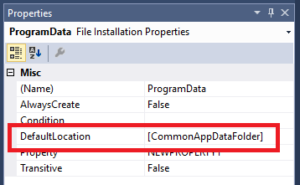
You will need to change the DefaultLocation to:
[CommonAppDataFolder]
So it should then look like this:
You can then go ahead and add files and folders to this folder and they will be installed into the ProgramData folder.
Comments
If you have any questions or feedback about this guide, please feel free to leave us a comment below and we will try to get back to you as soon as we can.
Share this content:

How can i set the write permission to a file inside this folder
How can i set the write permission to a file inside this folder