Estimated reading time: 2 minutes
If you’re using Windows 10 Professional, Enterprise, or Education, the easiest way to disable and hide OneDrive is by using the Local Group Policy Editor (or Group Domain Policy if on a corporate domain).
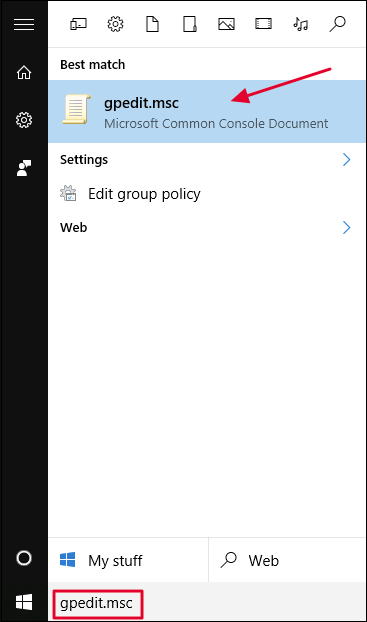
In Windows 10, press Start, type gpedit.msc, and press Enter.

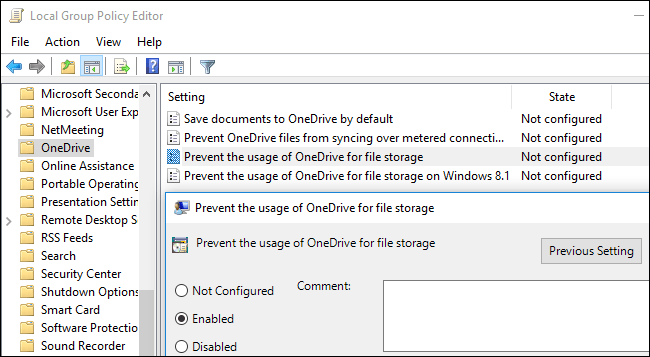
In the Local Group Policy editor’s left pane, drill down to Computer Configuration > Administrative Templates > Windows Components > OneDrive. Double-click the “Prevent the usage of OneDrive for file storage” policy setting in the right pane, set it to “Enabled,” and click “OK.”
This completely disables access to OneDrive. OneDrive will be hidden from File Explorer and users won’t be allowed to launch it. You won’t be able to access OneDrive at all, not even from within Windows Store apps or use the camera roll upload feature.

You shouldn’t uninstall OneDrive from the Control Panel or Settings application if you use this method. If you do, you’ll continue to see an empty OneDrive folder in File Explorer. If you see an empty OneDrive folder in File Explorer after changing this group policy setting, you’ll need to reinstall OneDrive from the Windows system folder. Once you do, the empty OneDrive folder will vanish from File Explorer.
To undo this change, just head back to here and change the policy to “Not Configured” instead of “Enabled.”
Source: HowtoGeek
Share this content:
Discover more from TechyGeeksHome
Subscribe to get the latest posts sent to your email.
